I’m a big fan of the keyboard shortcuts. I always use keyboard shortcuts when I work with any software. Revit is no exception. Revit has shortcut keys to allow you to work efficiently.
Keyboard Shortcuts That You Can Use in Revit
There are three types of keyboard shortcut that you can use in Revit:
- The default Windows shortcuts
- The Revit shortcut keys
- Ribbon shortcut (we will cover this separately)
The default Windows shortcuts are the same for all Windows compliant software, for example, ctrl+C for copy, ctrl+P for print, ctrl+Z for undo, et cetera.
The Revit Shortcut Keys
Revit also has specific keys shortcuts. For example, you can key in W then A to activate the wall tool. D R to activate the door tool. The shortcuts can be combinations (like ctrl+1 to toggle properties palette) or by pressing keys consecutively (like DR to activate the door tool).
You can see the complete default shortcut keys here: https://www.autodesk.com/shortcuts/revit

Customizing Revit Shortcuts
Everyone uses different tools more than others. You can create your own shortcuts to access your preferred tools easier.
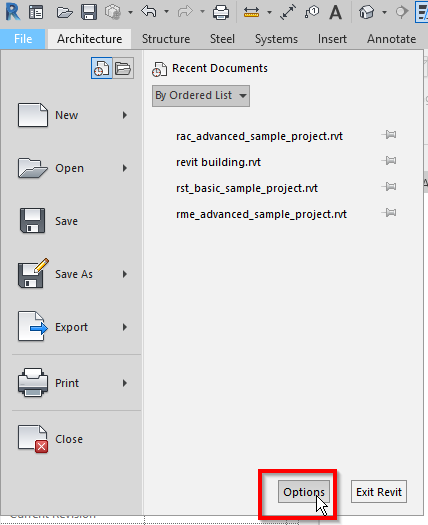
You can modify the shortcuts in Revit options. Click File then Options button.
In the User Interface category, click Keyboard Shortcuts.

Select a command that you want to assign a shortcut key then click assign.
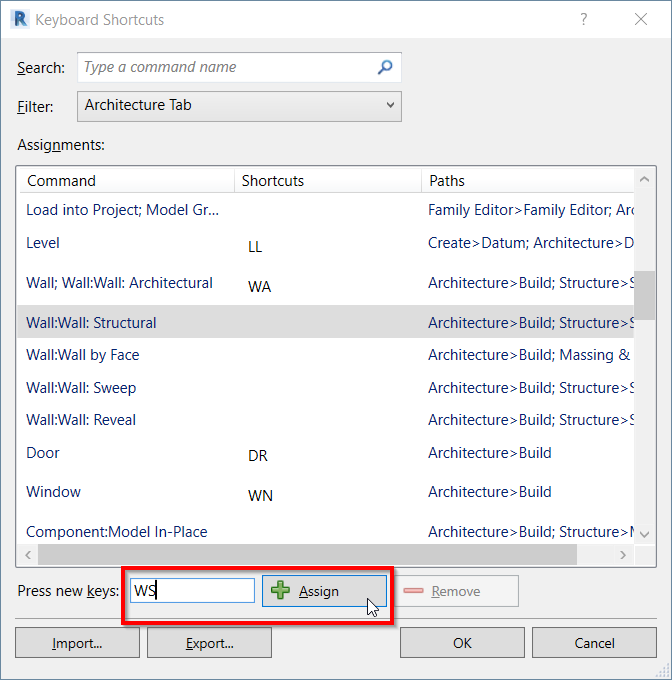
Notice that you can also export your favorite shortcut keys if you want to use it on another computer.
Click OK until you close all the dialog boxes.
Summary
Shortcut keys are very useful to help you become more productive. Some of the shortcuts like spacebar are even don’t require any input. If you haven’t used shortcuts, I suggest you start now.